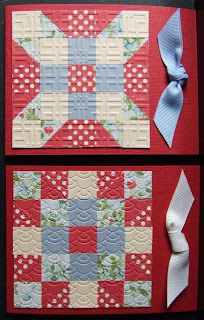
I saw a tutorial over at SCS a while back. It looked pretty simple and kinda fun. So I copied the page and kept it in my file of things to try. It was called Paper Quilt.
Well, I got bored working on my Teacher Appreciation items, so I thought I would make my cards for my swap I participate in every month. I thought it would be a good time to use that pattern!
What paper to use?
Well, I get a scapbooking kit every month from ETM. The place I make recipe cards for. I thought it might be about time I used one of them! So for the month of March, they had these papers in the kit. So here are my cards I made, using only things from my kit. (The ribbon was extra, because I needed a bit more than what the kit came with)
Here's the first two...
 The second two...
 The third two...
 So, I cut the designer paper in 3/4 inch blocks. I used two pattern papers. The red dot, and the green floral print. Then I cut 3 solid papers in 3/4 inch blocks. I used vanilla, red and blue. All of the paper came from the kit, even the cards the blocks are put on.
 Once the blocks are put in the pattern, you adhere them all down. I just put them on scrap paper. Then the fun part. Get your Cuttlebug out (or your big shot...whatever you have) and you take some embossing plates and run them through embossing them. It makes them look like they are quilted!
 Here are my last 2 cards, I made 8 for swap, and all 8 cards are made from the same papers, but all of them have different designs!
 Hope you like!


